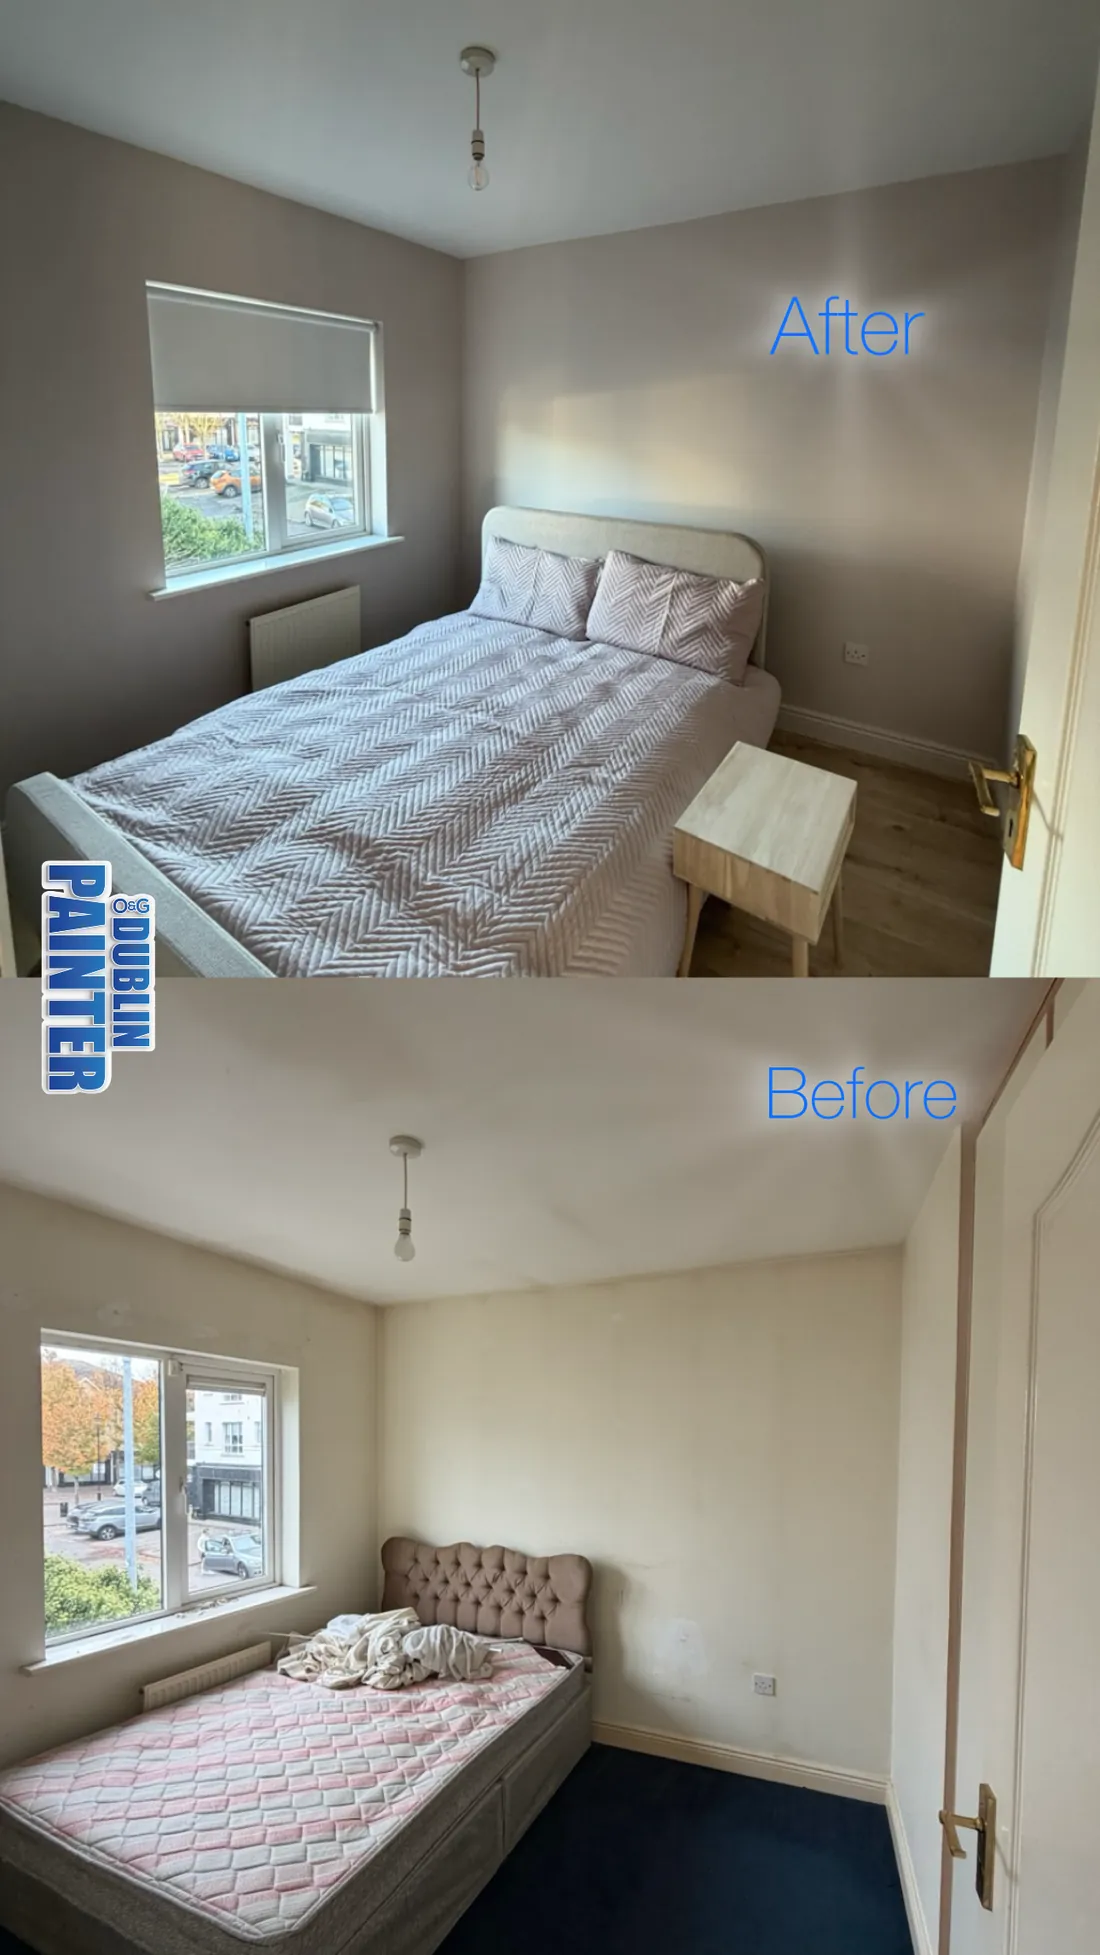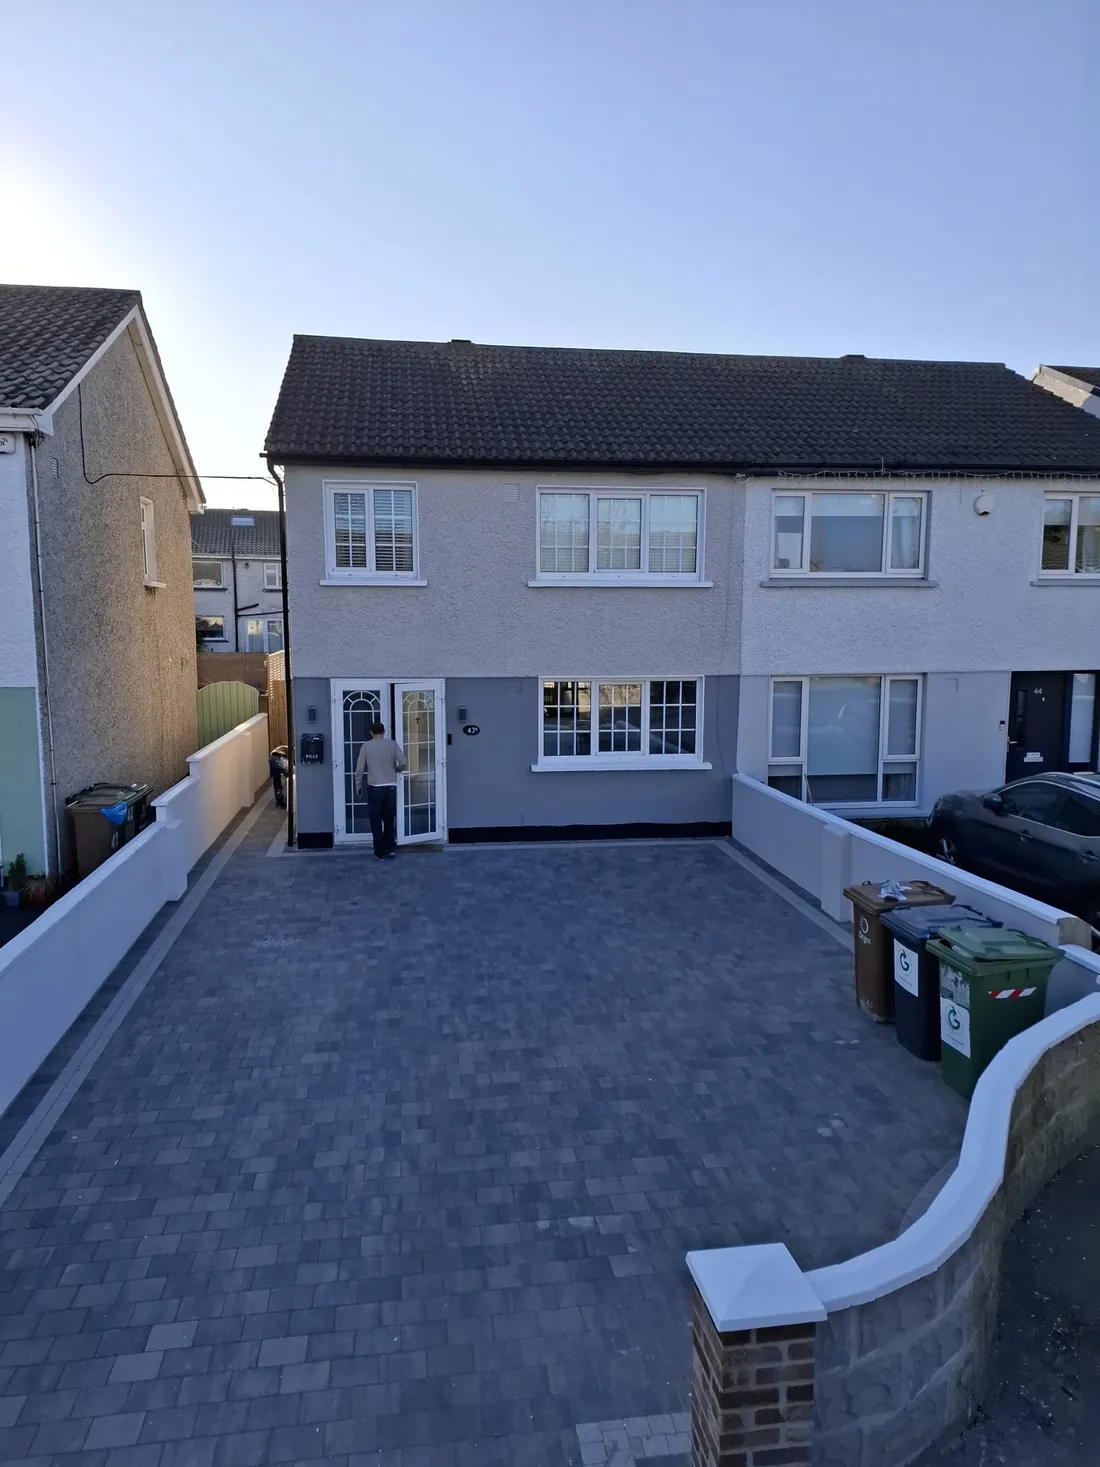
A fresh coat of paint is one of the fastest ways to transform a room, a hallway or a whole house — but the difference between a finish that still looks crisp in five years and one that flakes by next winter comes down to what happens before the brush touches the wall. A great house painting project rests on a solid foundation: careful planning, the right materials, a sensible timeline and the correct conditions for the paint to cure. Below, drawing on more than 20 years of decorating homes right across Dublin, we walk through everything a homeowner should know to get a picture-perfect finish that lasts.
The Foundation of a Flawless Painting Project
Every successful painting project starts long before you open a tin. Rushing straight to the walls is the single most common reason a job disappoints — the paint may go on, but without groundwork it rarely stays looking good. Get the planning and the timing right and you set yourself up for results that hold up beautifully in Dublin’s damp, changeable climate.
The Importance of Proper Planning for a Painting Project
Good planning is the first step towards a project that runs smoothly and delivers exactly what you pictured. A well-organised painting project usually comes down to a handful of critical tasks:
- Assessing the scope — Work out precisely which rooms, walls, ceilings and woodwork are being painted, and how big the job really is. This tells you what resources and time you’ll need.
- Budgeting — Estimate the cost of paint, materials, labour and a little contingency for the surprises that older Dublin homes love to throw up (hidden cracks, damp patches, layers of old gloss).
- Scheduling — Set a realistic timeline that allows for preparation, painting and proper drying between coats. Cutting drying time short is a false economy.
- Choosing your materials — Pick the right type of paint and tools for each surface, weighing up durability, the finish you want and how each room is actually used.
- Doing your research — Understand the process before you start, whether you’re going the DIY route or briefing a contractor. The more you know, the better the decisions you’ll make.
- Deciding who does the work — If you’d rather hand it over, take the time to find a reputable, well-reviewed painter rather than the cheapest name you can find.
Thorough planning does more than prevent expensive mistakes — it saves you time, keeps waste down and helps you make choices you won’t want to undo six months later. It’s the least glamorous part of any interior painting job and, quietly, the most important.
Choosing the Right Time for Your Painting Project
Timing has a bigger influence on the outcome than most people expect. To give the paint the best chance of curing evenly and lasting, weigh up:
- Weather conditions — The ideal window is dry, mild weather. High humidity or extreme temperatures interfere with how paint goes on and how it dries — a genuine consideration in Ireland, where a bright morning can turn to rain by lunchtime. This matters most for exterior painting, where you’re at the mercy of the elements.
- Indoor conditions — For interior work, keep rooms well ventilated and the temperature steady so each coat dries properly. Painting a cold, closed-up room in the depths of winter is asking for trouble.
- Your routine — Schedule the work for a time that disrupts your household or business as little as possible. A little forethought about which rooms you’ll lose, and when, keeps the whole thing far less stressful.
- The season — Some times of year suit painting better than others simply because the weather and temperature stay more consistent. Late spring through early autumn tends to be kindest in Dublin.
Understanding the best time to paint isn’t fussiness — it’s what gives you a smoother application and a finish that lasts. Get the timing right and you’re already halfway to a job you’ll be happy with for years.
Selecting the Perfect Paint for Your Painting Project
Choosing the right paint is one of the make-or-break decisions in any project, whether it’s a cosy family home in Rathmines or a busy commercial unit in the city centre. The correct paint doesn’t just look the part — it protects the surface underneath and stands up to daily life.
Types of Paint and Their Uses
Matching the paint to the surface is essential for durability and for the finish you’re after. Different paints are built for different jobs:
- Water-based paints — Easy to work with, low in odour and quick to dry, these are the go-to for interior walls and ceilings. They’re also the more environmentally friendly option and clean up with water.
- Oil-based paints — Tough and stain-resistant, oil-based paints come into their own on trims, skirting, doors and any surface that takes a knock. They take longer to dry but wear like iron.
- Latex-based paints — Genuinely versatile and suitable for both interior and exterior surfaces, latex delivers a clean, hard-wearing finish across a wide range of jobs.
- Acrylic paints — Prized for resisting fading and cracking, acrylics perform well on tricky surfaces including wood and metal, holding their colour even in strong light.
Each type has its place, and getting the match right lifts the whole job. If you’d like to keep the project as low-impact as possible, ask about low-VOC and eco-friendly ranges — modern formulations no longer force you to choose between green credentials and a quality finish.
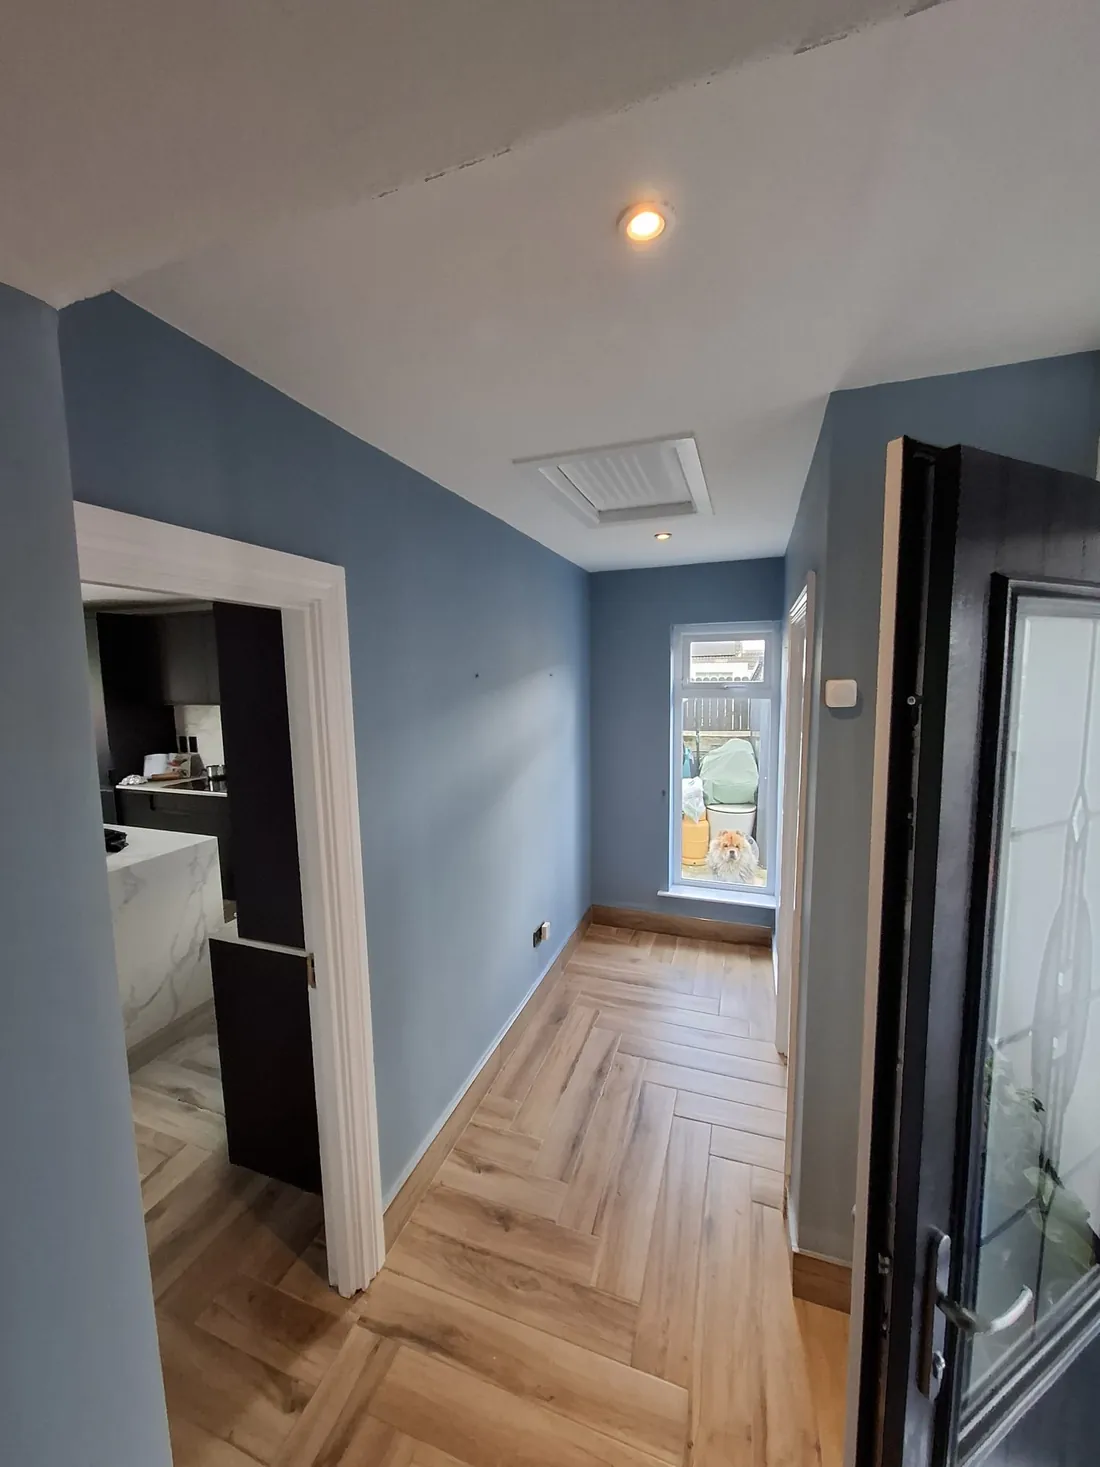
Colour Selection and Psychology
Choosing a colour is about far more than looks — the shades you pick shape how a room feels and even how you behave in it. The right palette can completely change the atmosphere of a space:
- Warm colours — Reds, oranges and yellows bring warmth and energy, which makes them a lovely fit for living rooms, kitchens and sociable spaces.
- Cool colours — Blues, greens and purples read as calm and restful, ideal for bedrooms and bathrooms where you want to wind down.
- Neutral colours — Whites, greys and beiges are endlessly versatile and make a quiet backdrop that lets furniture, art and light do the talking.
When you’re settling on a colour, factor in what the room is used for, how much natural light it gets and the overall mood you’re chasing. Dublin’s soft northern light can make a shade look very different at 9am and 5pm, so it always pays to test a sample patch on the actual wall and live with it for a day or two before committing. Sound colour advice is one of the things our customers mention most in their reviews — a shade that looks perfect on a chart can fall flat once it’s up, and a second, experienced opinion is worth having.
Preparing Your Space for a Painting Project
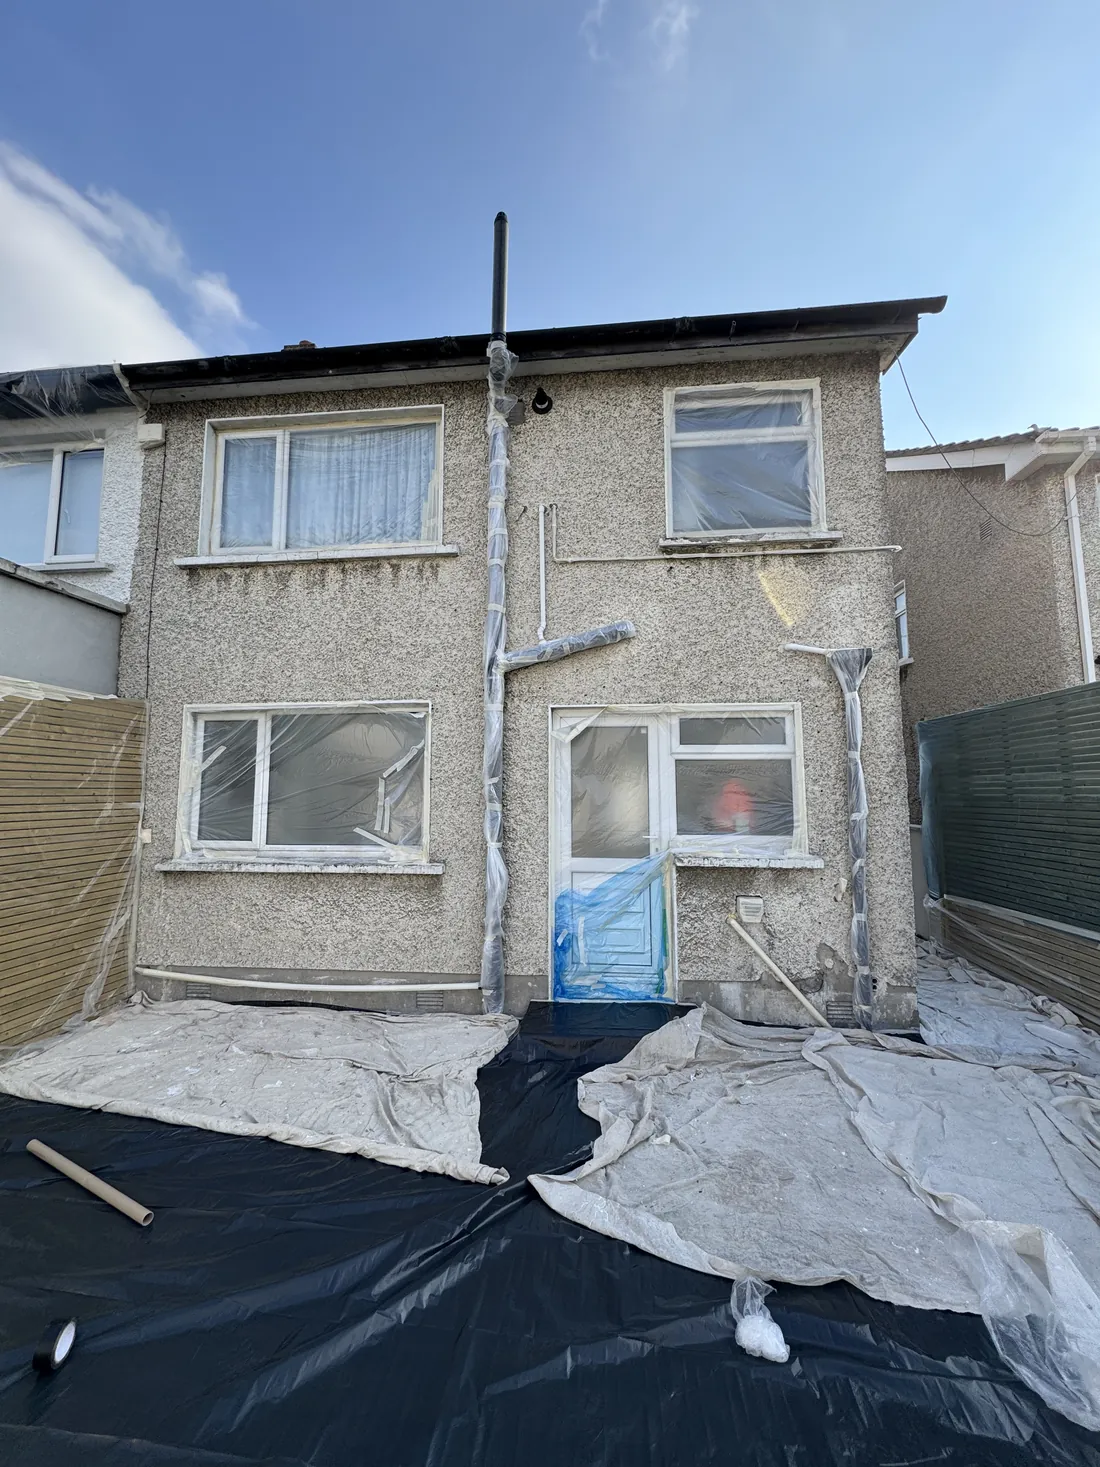
Before any transformation begins, proper preparation is what separates a tidy, professional result from a messy one. Preparation breaks down into two jobs: protecting everything you don’t want painted, and getting the walls themselves ready to accept the new coat.
Protecting Furniture and Surfaces
Safeguarding your furniture and surfaces prevents the spills and splatters that turn a fresh coat into a headache. Start by clearing as much furniture out of the room as you can. Anything too large or awkward to move should be shifted to the centre and covered securely with drop cloths or plastic sheeting so it stays protected from start to finish.
Next, protect the floor. Lay drop cloths or heavy-duty paper across the whole surface and tape the edges down with painter’s tape so nothing slides around and no gaps are left exposed. A well-covered floor is the mark of a job being done properly — and it’s a big part of why customers describe our crews as tidy and clean.
Finally, mask off electrical outlets, switches, trim and window frames with painter’s tape. This small step is what gives you those sharp, clean lines and keeps stray paint off the finer details. It takes a few extra minutes and repays them many times over in the finished look.
Preparing the Walls
Proper wall preparation is essential — it’s what lets the paint grip and what delivers a smooth, flawless finish. Begin by cleaning the walls to lift off dust, dirt and grease, using a mild detergent and water. Let them dry completely before you go any further.
Then inspect closely for cracks, holes and imperfections — older Dublin properties almost always have a few. Fill them with a suitable filler, let it set, then sand back until the surface is smooth and even. Priming is the next crucial step, especially if you’re making a dramatic colour change or covering stains that could otherwise bleed through. A good primer means better adhesion and a more even, longer-lasting result.
By carefully protecting your furniture and surfaces and preparing the walls properly, you lay the foundation for a picture-perfect finish. These preparatory steps can feel slow and unglamorous, but they are exactly where a lasting job is won — and where a rushed one is lost.
Hiring a Professional Painter for Your Painting Project
For a project you want done right the first time, bringing in a professional painter is often the smartest move. The experience of a skilled contractor means the work is completed efficiently, to a high standard and without the costly trial-and-error a first-timer runs into.
Qualities of a Skilled Painting Contractor
A good painting contractor should tick several boxes:
- Experience — Years of hands-on work translate into a real understanding of techniques, materials and how to handle whatever a job throws up. Our lead painter, Alex, has more than 20 years behind the brush.
- Attention to detail — Precision is everything in painting; even a tiny imperfection is obvious once the light hits it.
- Reputation — Genuine reviews and references from past clients are the clearest signal of reliable, quality work. We’re proud of our 4.9-star rating across 137 Google reviews.
- Professionalism — Turning up on time, communicating clearly and treating your home with respect all matter as much as the painting itself.
- Insurance and guarantees — Proper cover protects you as the homeowner, and a workmanship guarantee means the contractor stands behind the job long after the last coat has dried. Our work is fully guaranteed.
Questions to Ask Before Hiring
Before you commit to a painter, a few well-chosen questions will tell you a lot:
- Can you provide references from previous clients?
- Are you fully insured, and do you guarantee your work?
- How many years of experience do you have with projects like mine?
- Which paint brands and finishes do you recommend, and why?
- How do you keep the work area safe and tidy?
- What’s your process for preparing surfaces before painting?
- Can you give me a detailed written quote and a realistic timeframe?
- How do you handle unexpected issues or changes to the scope of the job?
- Do you offer any warranty or guarantee on the finished work?
- Can you accommodate eco-friendly or low-VOC paints if I’d prefer them?
The answers tell you quickly whether a painter is the right fit for your project and your expectations. It’s also a good moment to gauge their eye for colour and their familiarity with current trends — details that separate a competent job from a genuinely great one. A trustworthy professional will happily walk you through a free, no-obligation on-site quote so you know exactly what you’re getting before any work begins. The right painter really does make all the difference between a finish you tolerate and one you love.
Expert Tips for a Flawless Finish
A flawless finish isn’t only down to the painter’s skill — the quality of the tools and materials matters just as much, and so does knowing the small techniques the professionals rely on. Get all three working together and the difference in the final result is unmistakable.
Importance of Quality Tools and Materials
The tools and materials you choose have an outsized effect on the outcome. Quality brushes and rollers are designed to hold more paint and lay it down more smoothly, while premium paints give better coverage and durability — which actually saves time and money over the life of the job by needing fewer coats and lasting longer between repaints.
| Tool or material | Function |
|---|---|
| High-quality brushes | Smooth application with fewer visible brush marks |
| Premium rollers | Even coating with less splatter and shedding |
| Top-tier paint | Better coverage, richer colour and a longer-lasting finish |
If keeping the project eco-conscious matters to you, there are excellent low-VOC and sustainable ranges that don’t compromise on quality. Investing sensibly in the right tools and materials is one of the surest routes to a genuinely professional-grade finish.
Techniques for Even Application
How you apply the paint has a huge bearing on how even and smooth the final surface looks. A few techniques the professionals lean on:
- Load the brush or roller properly — Not so much that it drips, but enough to avoid patchy coverage that forces extra coats. Finding that balance is half the battle.
- Keep a wet edge — Always work from wet paint into dry to avoid lap marks. That means planning the sequence of the wall and timing your strokes so you never let an edge dry before you reach it.
- Use the ‘W’ or ‘M’ technique — With a roller, lay the paint on in a large ‘W’ or ‘M’ shape to spread it widely, then fill in the gaps. This distributes the paint evenly and prevents heavy, streaky patches.
If you’re planning to tackle the job yourself, it’s well worth reading up on the common DIY pitfalls before you start — many of the mistakes people make are entirely avoidable with a little preparation. And for anything demanding, like a full house repaint or detailed kitchen cabinet painting, a professional finish is often worth every cent.
Maintaining Your Picture-Perfect Painting Project
Once the project is finished, a little ongoing care keeps it looking vibrant far longer. Sensible maintenance means fewer touch-ups, preserves the overall look of your rooms and keeps everything feeling fresh and polished for years.
Daily and Seasonal Maintenance Tips
Regular attention is what protects the integrity of the paint over time. A few habits go a long way:
- Day to day:
- Dust and wipe walls gently with a soft cloth or duster so dirt and grime never build up.
- Deal with spills and marks straight away, before they have a chance to set into the surface.
- Season to season:
- Give painted surfaces a proper once-over to spot any early signs of wear or damage.
- Wash walls down with a mild detergent as part of a spring clean to lift away any build-up from the darker months.
| Season | Maintenance activity |
|---|---|
| Spring | Wash walls down with a mild detergent |
| Summer | Dust and wipe surfaces regularly |
| Autumn | Inspect for, and repair, any minor damage |
| Winter | Touch up areas affected by indoor heating and condensation |
Dublin’s damp winters and central heating in particular can be hard on interior walls, so the seasonal checks are more than a formality — they catch small problems while they’re still small.
Touching Up and Making Repairs
Even with diligent care, the odd touch-up or repair is inevitable over the years. To keep fixes seamless:
- Clean the area to be touched up, removing any dust or debris.
- Lightly sand it to give the new paint a smooth surface to grip.
- Apply primer if the repair covers a larger area, or if there’s a strong contrast between old and new paint.
- Use the original paint wherever possible for the closest match — and keep any leftover tins labelled and stored for exactly this reason. If the original is gone, an experienced painter can colour-match it closely.
- Apply with a small brush or roller, feathering the edges so the repair blends into the surrounding wall rather than standing out as a patch.
Follow those steps and you’ll keep the finish looking fresh and extend the life of the whole job. For anything beyond a simple touch-up — or if the repairs are starting to add up — bringing in a professional is usually the smarter investment, and protects the pristine look you paid for in the first place. Maintaining a paint job is an ongoing process, but with a little attention and prompt action your painted spaces will stay bright and vibrant for years.
If you’d rather leave the whole thing in experienced hands, we’d be glad to help. Get a free quote for your project — it’s a no-obligation, on-site visit, and every job we do is fully guaranteed.
FAQ: House Painting Project — Expert Tips for a Picture-Perfect Finish
1. What is the first step in a successful painting project?
Proper planning. Start by assessing the scope of the work, setting a budget, agreeing a realistic schedule and choosing the right materials. Get those foundations right and the actual painting goes far more smoothly — with results that last.
2. How do I choose the right paint for my project?
Match the paint to the surface and the conditions it will face. Water-based paints suit interior walls and ceilings, oil-based paints are best for trims and doors, and latex and acrylic paints are versatile enough for a wide range of interior and exterior surfaces.
3. When is the best time to start a painting project?
When the weather is dry and mild. For interior work, make sure the room is well ventilated and the temperature is steady. Avoid painting in extreme heat, cold or high humidity, all of which interfere with how the paint dries and adheres — a real consideration in Dublin’s changeable climate.
4. How can colour selection affect my space?
Colour has a big influence on the mood of a room. Warm tones like red and yellow bring energy and warmth, cool tones like blue and green feel calm and relaxing, and neutrals give you flexibility. Always test a sample on the actual wall, as Dublin’s light changes the look through the day.
5. How should I prepare my space before painting?
Protect furniture and flooring with drop cloths or plastic sheeting, and mask off trim, skirting and electrical outlets with painter’s tape. This prevents spills and gives you the clean, sharp lines of a professional finish.
6. Why is wall preparation so important before painting?
Wall preparation is what lets the paint grip and what delivers a smooth, even finish. Clean the walls, fill and sand any cracks or holes, and prime where needed so the new paint adheres well and covers evenly.
7. When should I hire a professional painter?
If you want high-quality, efficient results and would rather avoid costly mistakes, a skilled professional is usually the best choice. Look for experience, genuine reviews, proper insurance and a workmanship guarantee — and ask for a free, no-obligation quote before committing.
8. What are the benefits of using quality tools and materials?
Good brushes and rollers lay paint down more smoothly with fewer marks, and premium paints give better coverage, durability and colour retention. The right tools and materials improve both the efficiency of the job and the finish you end up with.
9. How do I maintain my painted surfaces after the project is complete?
Dust walls gently, clean marks and spills promptly, and inspect regularly for wear or damage. A quick seasonal check — especially through Dublin’s damp winters — keeps the paint sound and your rooms looking fresh for longer.
10. How do I handle touch-ups and repairs?
Clean the area, sand it lightly and prime if needed. Use the original paint for the closest match, then apply with a small brush or roller, feathering the edges so the repair blends seamlessly into the surrounding wall.