Bringing a room to life with fresh colour looks simple from the outside, but a truly durable, professional finish is the result of a well-drilled process that runs from the very first visit to the final walkthrough. When you hire experienced professional painters, every stage — preparation, priming, coating and clean-up — is handled with the kind of precision that a weekend DIY job rarely matches. Over 20+ years painting homes across Dublin, and with a 4.9★ rating from 137 Google reviews, we’ve refined that process until it’s second nature. This guide pulls back the curtain on exactly how a professional painting project unfolds, so you know what to expect before the first tin is even opened.
Why the Painting Process Matters
A good painting company doesn’t just apply colour to a wall — it follows a repeatable, methodical process that protects your home, your belongings and your budget. That structure is what separates a finish that still looks crisp in ten years from one that peels, streaks or marks within months.
The Value of Hiring Professional Painters
Professional painters bring more than a steady hand. They bring years of experience solving the problems that inevitably crop up mid-project: a patch of hidden damp, a poorly bonded old coat, awkward high ceilings, or a colour that reads completely differently under Dublin’s grey winter light. They also work with the right materials and techniques to guarantee an even, long-lasting result that lifts both the look and the resale value of your home.
Just as importantly, a professional crew keeps up with the latest paints, colour trends and lower-VOC formulations, so the finish is not only beautiful but healthier to live with. Because we work as a service-area business, we bring that same standard right across Co. Dublin, Kildare, Meath and into parts of Wicklow and Co. Louth. Whether it’s a full interior painting refresh or weather-proofing the outside of your home, the process is what keeps the quality consistent.
What to Expect When You Work With Us
Working with professional painters should feel organised and calm from start to finish. The project opens with a proper consultation, where we listen to your vision and talk through colours, finishes and timing. From there, everything is planned in advance — the schedule, the materials and the order of works — so there are no surprises once we’re on site.
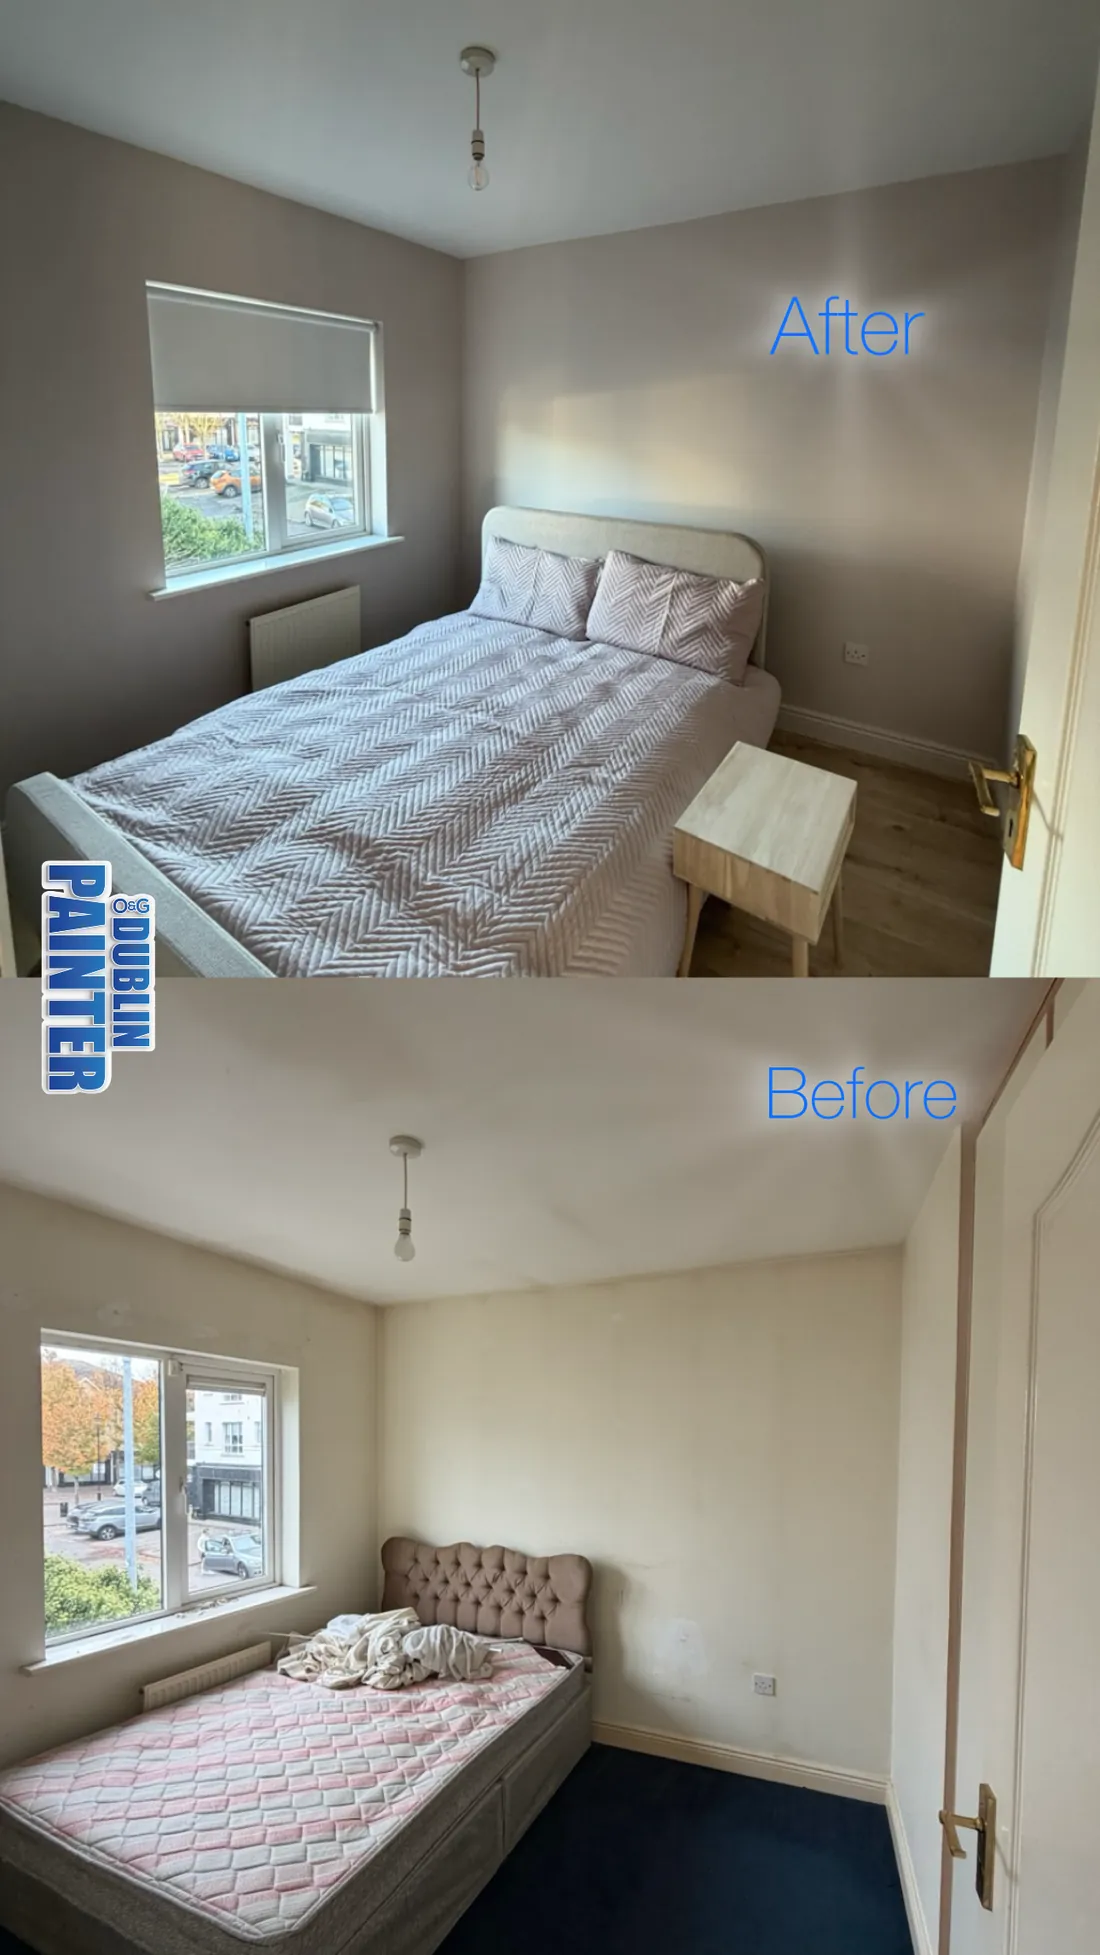
Preparation is where the real quality is won: surfaces are cleaned, repaired and primed so the paint bonds properly and lasts. During the painting itself, you can expect tidy, efficient work with minimal disruption to your daily routine — being clean and unobtrusive is one of the things our customers mention most in their reviews. The final stages of detailing, touch-ups and a shared inspection make sure the result is flawless before we consider the job done and leave your home exactly as we found it, only brighter.
Step 1: The Initial Consultation
Every successful painting project begins with a conversation. The initial consultation is where you and your painter build a shared understanding of the work, the timeline and the outcome you’re after. It’s also a free, no-obligation on-site visit — there’s no commitment in simply finding out what’s involved.
Assessing Your Space
We start by walking the space and assessing it in detail. That means looking at the size, shape and condition of each area, and noting the features that affect the job: high ceilings, large windows, ornate coving or fiddly trim work. We also check the existing colours, how the natural light falls, and any potential problems such as moisture, cracking or uneven surfaces.
This is also when we take measurements to work out how much paint and material the job needs and how long it will realistically take. A simple room-by-room breakdown might look like this:
| Area | Dimensions | Specific Considerations |
|---|---|---|
| Living Room | 20 × 15 ft | High ceilings, plenty of natural light |
| Kitchen | 12 × 10 ft | Humidity, cabinets to work around |
| Bedroom | 15 × 12 ft | Accent wall, built-in shelving |
Discussing Your Vision and Expectations
With the assessment done, the conversation turns to what you actually want. This is your chance to describe the finished look you have in mind — favourite colours, the sheen you prefer, and any specific requests, from a bold feature wall to a whole-house palette that flows from room to room.
Good colour advice is where an experienced painter earns their keep. We’ll offer honest guidance on shades and finishes, weighing your personal taste against practical factors like room size, orientation and Dublin’s often-muted daylight. If you’d prefer lower-odour, eco-friendlier options, we’ll point you towards them too.
We actively encourage questions at this stage — about primers, drying times, the number of coats, how furniture is protected, or how long you’ll be out of a room. The goal of the consultation is simple: to line up our expertise with your aspirations and produce a clear roadmap that everyone is happy with before any work starts.
Step 2: Planning the Project
A carefully planned job is what lets us transform a space efficiently and without drama. This phase is about locking in the important decisions — colours, finishes and timing — so the work runs smoothly from day one.
Choosing Colours and Finishes
Colour and finish set the entire mood of a room, and they affect durability just as much as looks. We help you navigate what can feel like an overwhelming number of options, steering you towards choices that suit both the style and the function of each space. A kitchen or hallway that takes daily knocks calls for a very different finish than a quiet bedroom ceiling.
Finishes range from flat matt through to high gloss, and each has its place. Here’s a quick reference to how the common sheens behave:
| Finish Type | Characteristics | Ideal Use |
|---|---|---|
| Flat / Matte | Non-reflective, hides imperfections | Low-traffic areas, ceilings |
| Eggshell | Slight sheen, washable | Living rooms, dining rooms |
| Satin | Velvety sheen, durable | Kitchens, bathrooms |
| Semi-Gloss | Reflective, easy to clean | Trim, mouldings, doors |
| High Gloss | Very shiny, hard-wearing | Accent areas, furniture |
The right combination often mixes finishes within a single room — a matt on the walls, a satin or semi-gloss on the woodwork — for the best balance of appearance and washability.
Understanding the Timeline and Process
Knowing roughly how long the job will take, and in what order things happen, is key to setting realistic expectations. We lay out a schedule covering each phase from preparation through to final inspection, so you can plan around the work with confidence.
The exact duration depends on the size of the area, the complexity of the job and the condition of the surfaces, but a typical room-by-room project tends to follow a rhythm like this:
| Stage | Work Carried Out |
|---|---|
| Day 1–2 | Surface preparation and priming |
| Day 3–5 | Applying paint — multiple coats as needed |
| Day 6 | Detailing and touch-ups |
| Day 7 | Clean-up and final inspection |
This is only a guide — timelines flex around drying times, the number of coats a deep colour needs, and any repairs that come to light. We’ll always flag adjustments as we go rather than spring them on you. Planning the project properly is what gives you peace of mind that the colours you chose and the timeframe we agreed will both be delivered.
Step 3: Preparing for Painting
Before a single wall changes colour, careful preparation does the heavy lifting. This stage is unglamorous, but it’s the single biggest factor in how good the finish looks and how long it lasts. Skipping it is exactly why so many DIY jobs disappoint.
Clearing the Area
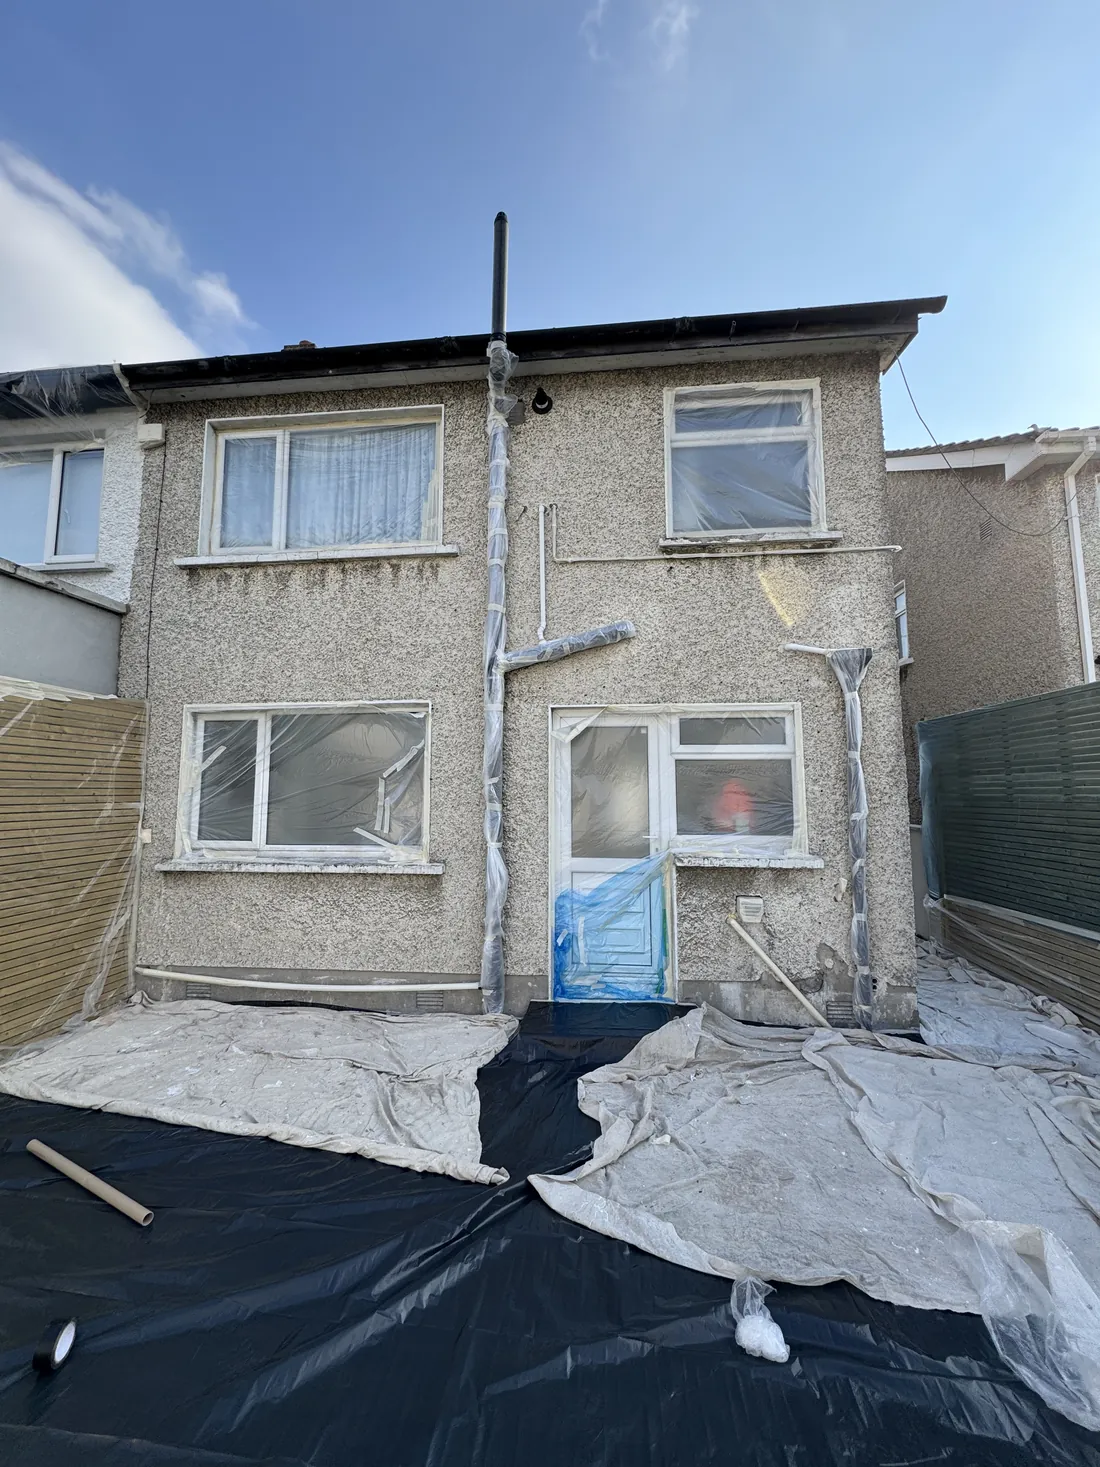
The first job is to clear and protect the room. Furniture, wall hangings and anything else that might get in the way — or catch a splatter — is moved out or shifted to the centre and covered. Larger, heavier pieces that can’t be moved are wrapped in dust sheets or plastic sheeting for protection.
A simple checklist keeps this stage thorough:
- Remove all wall décor and smaller furniture
- Cover larger pieces with protective sheeting
- Cover floors fully to prevent paint stains
- Remove or mask light switches and socket covers
Surface Preparation
With the room clear, attention turns to the surfaces themselves — the stage that most directly determines the final result. Walls are cleaned, repaired and primed as needed:
- Cleaning: Walls are washed to lift dust, dirt and oils that build up over time. A mild soap-and-water solution handles most of it; stubborn marks may need a specialist cleaner.
- Repairing: Holes, cracks and other imperfections are filled and sanded back until smooth, so the surface is genuinely uniform before any colour goes on. Where a wall needs more than a filler patch, our plastering and residential decorating work takes over.
- Priming: A coat of primer creates a consistent base, which matters especially when covering a darker colour or sealing stains. It also improves how well the paint grips the wall, giving a much more durable result.
| Task | Description |
|---|---|
| Cleaning | Removing dirt and stains from surfaces |
| Repairing | Filling holes and smoothing imperfections |
| Priming | Creating a uniform base for the paint |
Taking the time to prepare both the room and the surfaces properly is what lays the groundwork for a finish that still looks sharp years later. It’s slow, meticulous work — and it’s exactly where professionals separate themselves from a rushed job.
Step 4: The Painting Process
With the groundwork done, the transformation finally begins. The painting stage is a sequence of deliberate steps — priming first, then building up the colour in even coats — each one carried out with an eye on the finish.
Primer Application
Primer is the foundation of the whole job. It gives the paint a smooth, even surface to bond to and noticeably extends how long the finish lasts. A professional painter chooses the primer to match both the surface and the topcoat — there are different formulations for wood, plaster, drywall and metal, and using the right one matters.
Primer is applied methodically, so every part of the surface is covered. Get this stage right and the colour above it goes on evenly and holds up; rush it, and no amount of expensive topcoat will fully hide the difference.
Layering the Paint
Once the primer is dry, we build up the colour. Applying paint evenly and consistently is a genuine skill — it’s the difference between a wall that looks flat and rich and one that shows patches, roller marks or brush lines.
The number of coats varies with the colour, the type of paint, and the shade underneath. Two coats is the usual minimum, with extra applied for deep, saturated colours or to guarantee a perfectly even finish.
| Factor | Consideration |
|---|---|
| Colour Saturation | Deep or vivid shades may need additional coats |
| Type of Paint | Some paints cover in fewer coats than others |
| Previous Colour | Painting over a dark base often needs more layers |
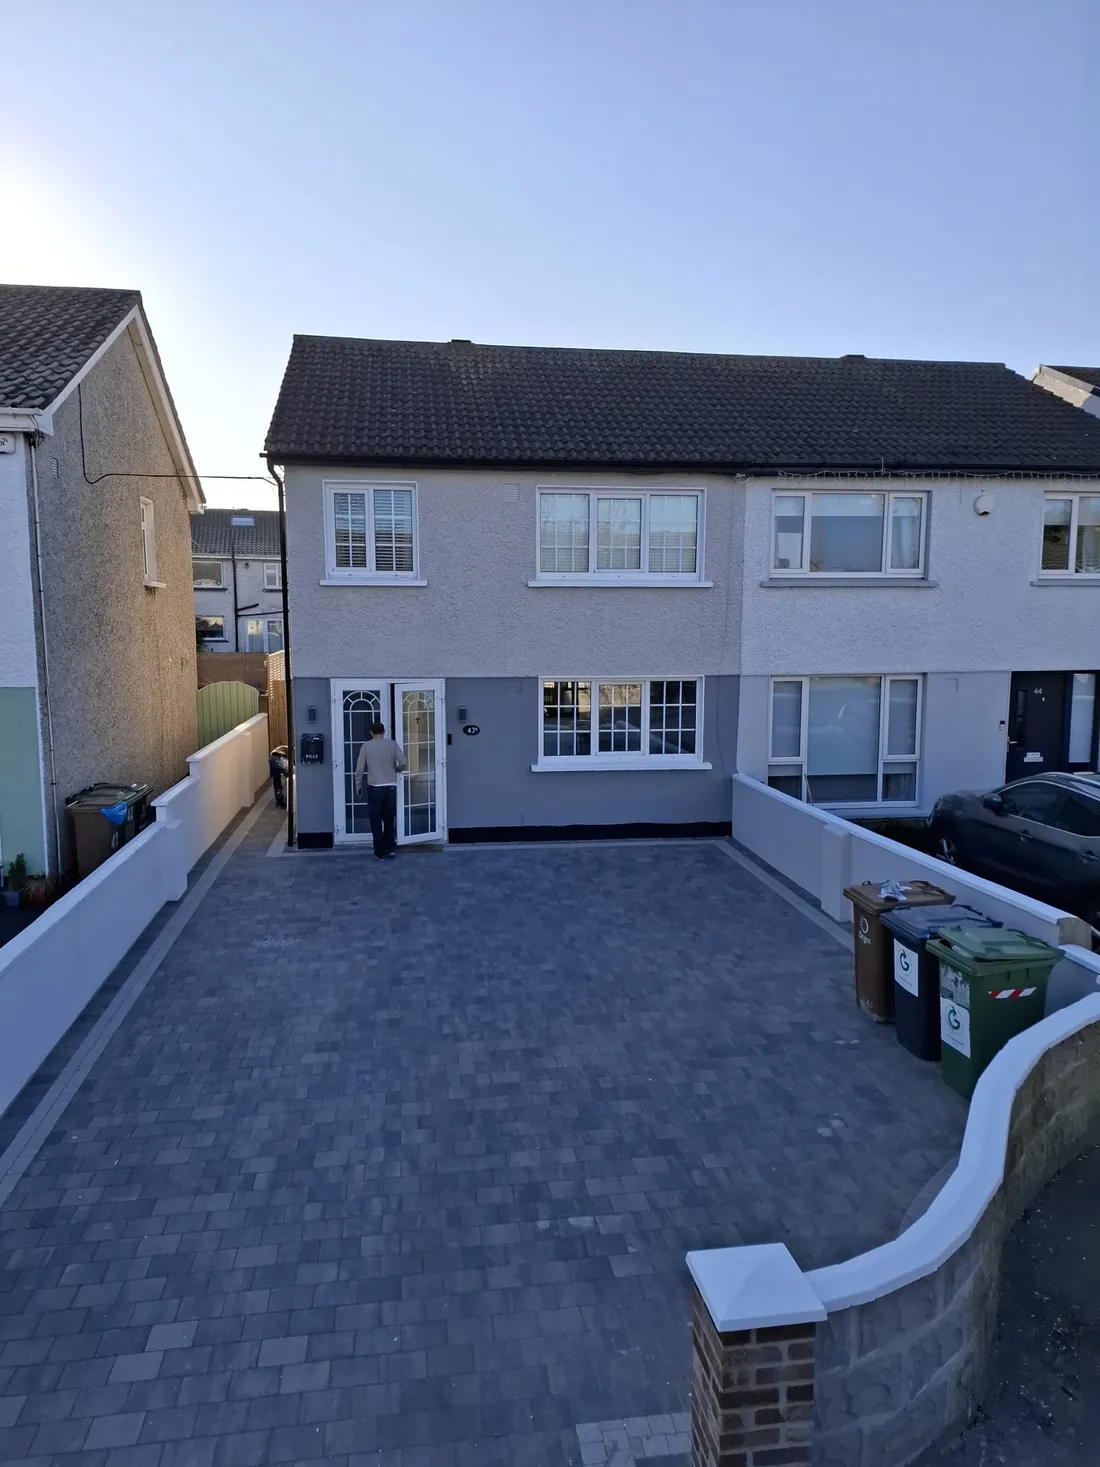
Each coat is left to dry fully before the next goes on — hurrying this is how smudging and colour dragging creep in. Throughout, we keep a close eye on the details: crisp edges, clean cut-in lines, and no visible strokes or roller marks. These are the techniques honed over 20+ years on the tools, and they’re what make a finish look effortless. The same care applies whether we’re rolling walls indoors or handling weather-exposed exterior painting where the coating has to stand up to Irish wind and rain.
Step 5: Detailing and Touch-Ups
Detailing and touch-ups are the stages that turn a good paint job into a flawless one. This is close, patient work aimed at eliminating any imperfection and delivering a perfectly uniform result.
Precision Work
Precision is everything here. We go over every painted surface, hunting for the small things that undermine an otherwise great result — a hairline gap, a faint drip, a slightly wavering line. Fine brushes and edging tools let us make those corrections cleanly, without disturbing the surrounding paint. It’s the sort of attention to detail that’s easy to skip and impossible to fake.
Ensuring a Flawless Finish
Once the detailing is done, we move to touch-ups: dabs of paint to cover any blemish or inconsistency that surfaced during the job, blended so they vanish into the finish. The aim is a seamless, cohesive surface with nothing to catch the eye for the wrong reasons.
We then review the work thoroughly, usually alongside you, to make sure it lives up to the standard we promised. This is where the value of hiring skilled professionals really shows — and why every job we complete is fully guaranteed. That care doesn’t just make a room look better today; it protects the longevity of the finish and, in turn, the value of your home. The same precision carries across every service we offer, from feature walls to kitchen cabinet painting, where a smooth, hard-wearing finish is everything.
Step 6: Clean-Up and Final Inspection
The job isn’t finished when the last coat dries — it’s finished when your home is spotless and you’re genuinely happy. The clean-up and final inspection are where we prove that a tidy, respectful service is part of the deal, not an afterthought.
Returning the Space to Order
Clean-up is a core part of the service, not a favour. We remove all materials, coverings and debris, put furniture and fixtures back where they belong, and sweep and vacuum so there’s no dust or stray paint left behind. The goal is to hand back a space that’s clean, organised and ready to use straight away.
| Task | Description |
|---|---|
| Removal of coverings | Protective materials are carefully taken down and disposed of where appropriate |
| Disposal of materials | Leftover paint, tape and packaging are disposed of responsibly and to local guidelines |
| Furniture rearrangement | Items are returned to place with attention to how you like the room |
| Cleaning of floors | Surfaces are cleaned of any dust, spills or splatters |
If any last minor touch-up is needed to make sure the room fully reflects the quality of the work, we’ll handle it during this phase rather than leaving it for you to notice later.
Final Walkthrough With the Client
The final walkthrough is the closing step, and we do it with you. Together we review the finished work, checking for anything that needs a final touch and giving you the chance to raise any questions or concerns while we’re still there.
The walkthrough is a chance to:
- Sign off on any last touch-ups
- Talk through how to care for and maintain the new paintwork
- Share feedback on how the project went
We often use a simple checklist so nothing gets overlooked and every painted area is inspected to the same standard:
| Area | Status | Comments |
|---|---|---|
| Walls | Inspected | Notes on colour consistency and finish |
| Trim | Inspected | Observations on edges and smoothness |
| Ceiling | Inspected | Any spots or streaks noted |
| Clean-up | Completed | Confirmation the space is clean and orderly |
This shared inspection is more than a formality — it’s how we build the trust that turns a one-off job into a long relationship and the kind of word-of-mouth that keeps our reviews at 4.9★. We take real pride in finishing every project with a clean home and a thorough check, leaving you with paintwork you’re proud of and a job done properly.
Frequently Asked Questions About Professional Painters
1. Why should I hire professional painters instead of doing it myself?
Professional painters deliver a high-quality, long-lasting finish that lifts both the look and the value of your home. They bring the right tools, proper surface preparation and years of technique, which means smooth, even coverage without the drips, patchy coats and early peeling that so often follow a DIY attempt. You also save yourself a lot of time and the cost of putting mistakes right later.
2. How do I choose the right professional painter?
Check reviews, ask to see examples of past work, and look for a painter with a genuinely strong local reputation — ours sits at 4.9★ from 137 Google reviews. Ask for references and a clear, itemised quote covering labour, materials and timelines, and make sure the work is guaranteed. A trustworthy painter will happily talk you through all of it.
3. How long does a professional painting project take?
It depends on the size of the job, the state of the surfaces and how many coats are needed. As a rough guide:
- A single room typically takes 2–3 days, including preparation, painting and drying.
- A full house interior can run 1–2 weeks, depending on the number of rooms.
- Exterior work can take anywhere from several days to a couple of weeks, largely dictated by the Irish weather and the amount of prep involved.
4. What type of paint do professional painters use?
We use high-quality paints matched to the surface and the setting. For interiors, we often recommend low-VOC (volatile organic compound) paints to cut fumes and keep the air healthier. For outside, we choose weather-resistant products built to cope with sun, rain and Dublin’s damp. Better paints usually carry longer warranties and simply wear better over time.
5. Do professional painters provide colour consultation?
Yes. Colour advice is one of the things our customers value most, and it’s built into our free consultation. We weigh up lighting, room size and your existing décor to help you land on a shade and finish you’ll love — and we’re always happy to talk options before you commit to anything.
6. How do professional painters prepare surfaces before painting?
Preparation is the foundation of a lasting finish, and we work through it methodically:
- Cleaning – removing dirt, grease and any mildew.
- Sanding – smoothing rough patches and taking back loose, flaking paint.
- Patching – filling cracks, holes and dents with filler or caulk.
- Priming – sealing the surface to improve adhesion and colour depth.
7. Will painters move furniture and cover floors?
Yes. We move or centralise furniture and wrap it in protective sheeting, and we cover floors, windows and fixtures to guard against splatters. If you have anything especially fragile or valuable, it’s best to move that yourself before we arrive, just for peace of mind.
8. Will professional painters clean up after the job is done?
Absolutely — leaving your home tidy is part of the service. That usually includes:
- Removing all dust sheets and protective coverings.
- Cleaning up any spills or splatters that happened along the way.
- Refitting fixtures and socket covers and returning furniture (where agreed in advance).
- Disposing of empty tins, tape and used materials responsibly.
- Sweeping, vacuuming or wiping down to clear any dust from prep and sanding.
We aim to hand your home back in the same condition — or better — than we found it. It’s always worth confirming the clean-up details up front, and with us they’re simply included.
9. How do I maintain my freshly painted walls?
A few simple habits keep new paintwork looking its best for longer:
- Dust walls regularly with a soft, dry cloth or microfibre duster.
- Wipe light marks with a mild soap solution and a damp sponge.
- Avoid harsh cleaners, which can dull or strip the finish.
- Touch up small scuffs with leftover paint to keep things fresh.
- Keep furniture from rubbing against the walls to prevent scuffs.
We’ll always leave you with any spare paint clearly labelled for exactly this.
10. Can professional painters work around my schedule?
Yes — we build the schedule around your life, not the other way round. We can plan the work across weekdays, weekends or evenings to keep disruption to a minimum. If you’re working to a firm deadline, like a move-in date or an event, let us know at the consultation and we’ll plan the project to hit it.
Ready to See the Process in Action?
Now that you know how a professional painting project really unfolds — from that first free consultation through to the final walkthrough — you can see why the process itself is what guarantees the finish. Over 20+ years across Dublin and the surrounding counties, we’ve refined every step until a beautiful, hard-wearing result is simply the expected outcome, backed by our guarantee and a 4.9★ reputation built on tidy, professional, on-time work.
Whether it’s a single room, a full house painting project or the exterior of your home, we’d be glad to walk you through it in person. Get a free quote today to arrange your no-obligation on-site consultation — and let’s bring your vision brilliantly to life.